
Introduction
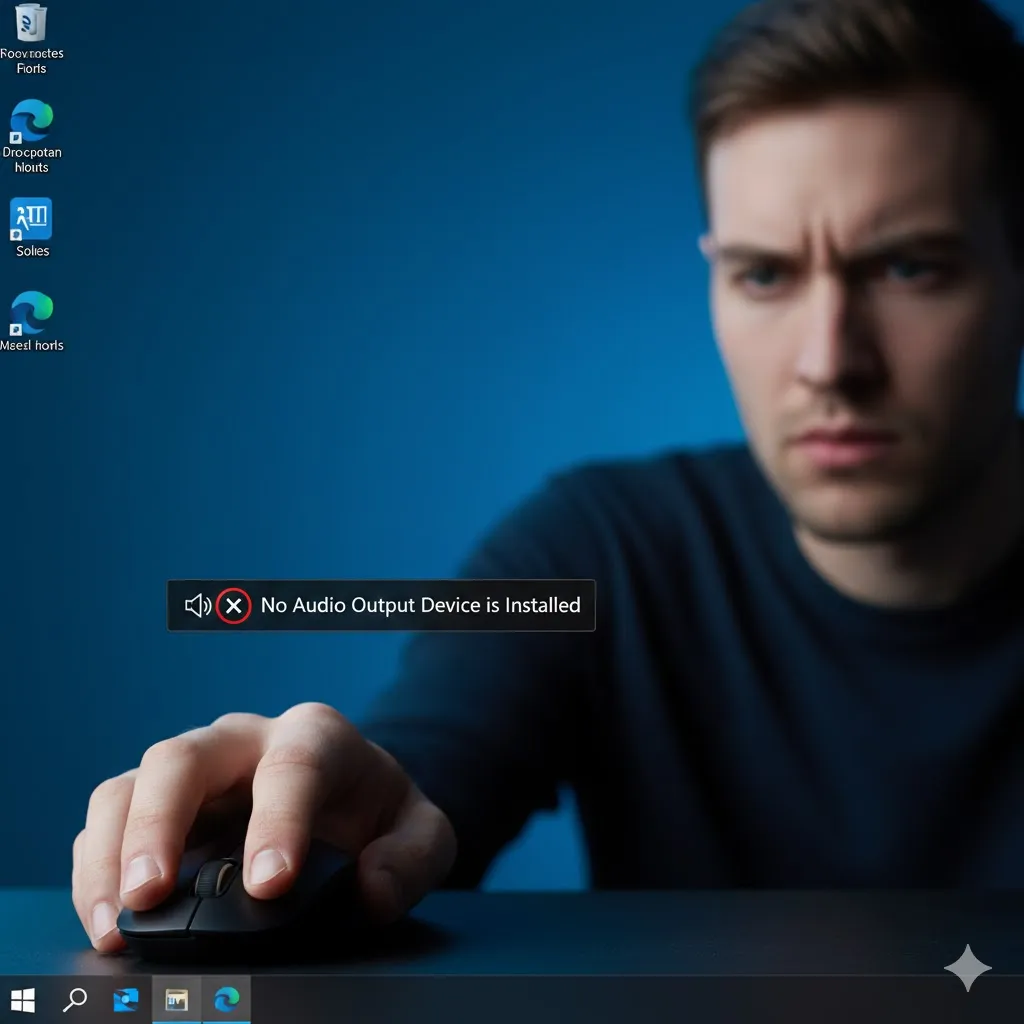
You want to listen to music or watch a YouTube video. You put on your headphones, but there is silence. You look at the speaker icon in the bottom right corner, and there is a terrifying red “X” circle on it.
When you hover over it, the message says:
“No Audio Output Device is Installed.”
You didn’t unplug your speakers. You didn’t delete anything. So why has your computer suddenly gone deaf?
This is a classic Windows bug, usually caused by a corrupted Windows Update or a broken Realtek driver. In this guide, I will show you how to bring the sound back in minutes.
Method 1: The “Add Legacy Hardware” Trick (The Best Fix)
If your sound card has completely disappeared from Device Manager, we need to force Windows to find it again.
- Right-click the Start button > Device Manager.
- Click on Action in the top menu bar > Add legacy hardware.
- Click Next > Install the hardware that I manually select from a list > Next.
- Scroll down and select Sound, video and game controllers > Next.
- Select Realtek (or the generic “High Definition Audio Device”) > Next > Finish.
- The red X should disappear immediately.
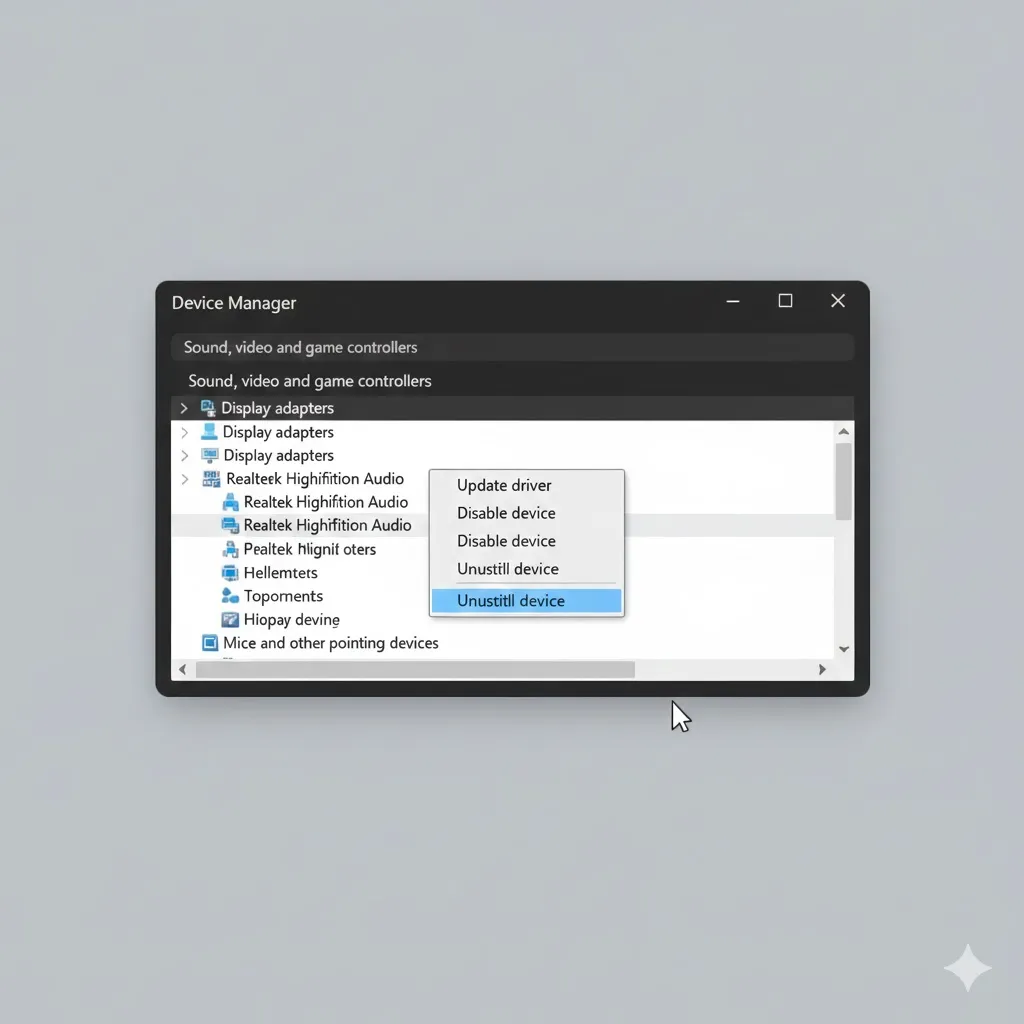
Method 2: Reinstall the Audio Driver
If the driver is there but broken, a fresh install will fix it.
- Open Device Manager.
- Expand Sound, video and game controllers.
- Right-click Realtek High Definition Audio (or Intel/AMD Audio).
- Select Uninstall device.
- Restart your computer.
- Windows will automatically detect the sound card and reinstall the correct driver upon reboot.
Method 3: Restart Windows Audio Services
Sometimes the background service that controls sound just crashes.
- Press Windows Key + R, type
services.msc, and hit Enter. - Scroll down to find Windows Audio.
- Right-click it and select Restart.
- Do the same for Windows Audio Endpoint Builder.
- Check if the sound is back.
Method 4: Fix the “Intel Smart Sound” Driver
On many modern laptops (Dell, HP, Lenovo), a specific Intel driver causes conflicts.
- Open Device Manager.
- Expand System devices (Not Sound controllers!).
- Find Intel Smart Sound Technology (SST) Audio Controller.
- Right-click it > Update driver.
- Select Browse my computer > Let me pick from a list.
- Select High Definition Audio Controller instead of the Intel one.
- Click Next. The sound should return instantly.
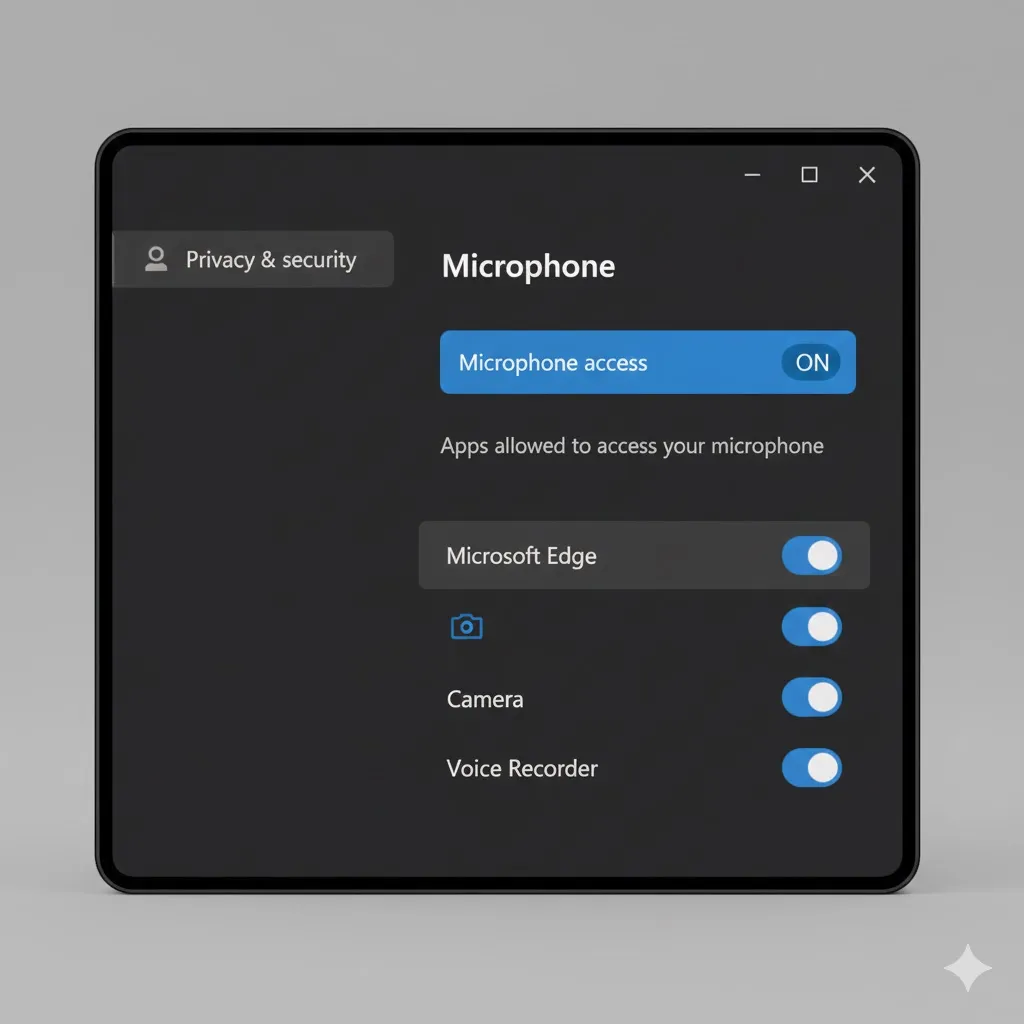
Method 5: Check Your Privacy Settings
Believe it or not, Windows can block audio if it thinks it’s protecting you.
- Go to Settings > Privacy & security > Microphone.
- Ensure “Let apps access your microphone” is ON.
- Strange fact: If microphone access is blocked completely, sometimes the output audio gets disabled too on certain headsets.
Frequently Asked Questions (FAQ)
Q: Why does this happen after a Windows Update?
A: Updates often overwrite old drivers with “newer” ones that might not be fully compatible with your specific motherboard. Method 2 (Reinstall) usually reverts this.
Q: My Bluetooth headphones connect but have no sound. Why?
A: You might be on the wrong “Device”. Click the Speaker icon and make sure the output is set to “Headphones (Stereo)” and not “Headset (Hands-Free AG Audio)”.
Q: Do I need to buy a new sound card?
A: Extremely unlikely. Unless you spilled water on your laptop, the sound chip is fine. It is almost always a software issue.
Conclusion
Seeing that Red X on your speaker icon is annoying, but it’s rarely a hardware failure. Using the Legacy Hardware tool (Method 1) or fixing the Intel Smart Sound driver (Method 4) solves this for 95% of users.
Turn the volume up and enjoy your music again!
Did the Legacy Hardware trick work for you? Let me know in the comments below!